Expeditions
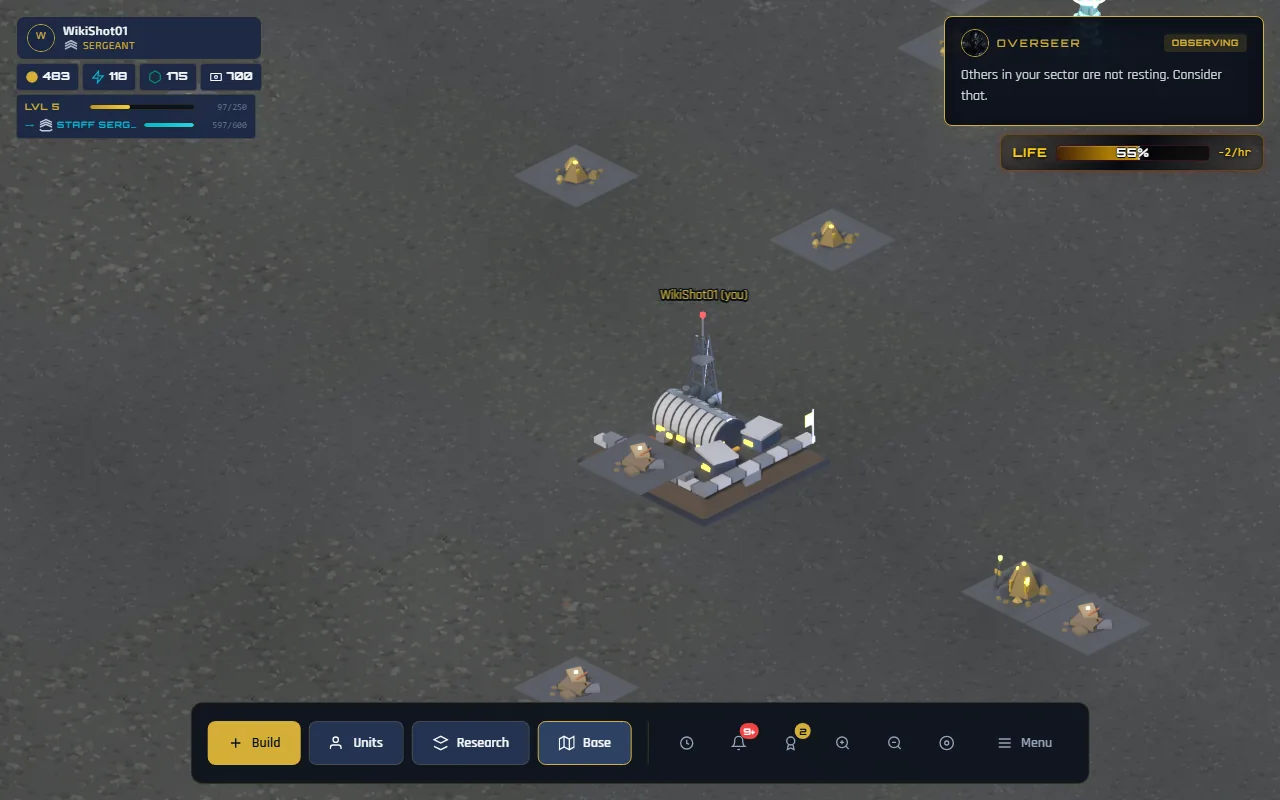
Send troops out to a deposit on the sector map and they walk there, dig, and carry the load home. A single trip can be worth more than your entire base produces in a day — once you are in a Control Sector, this is the game's real economy.
How to send one
- Join a Control Sector Expeditions need a position in the world. You get one when you finish the tutorial.
- Open the Map The Map button in the action bar. Your base is in the middle; deposits are the small markers scattered around it.
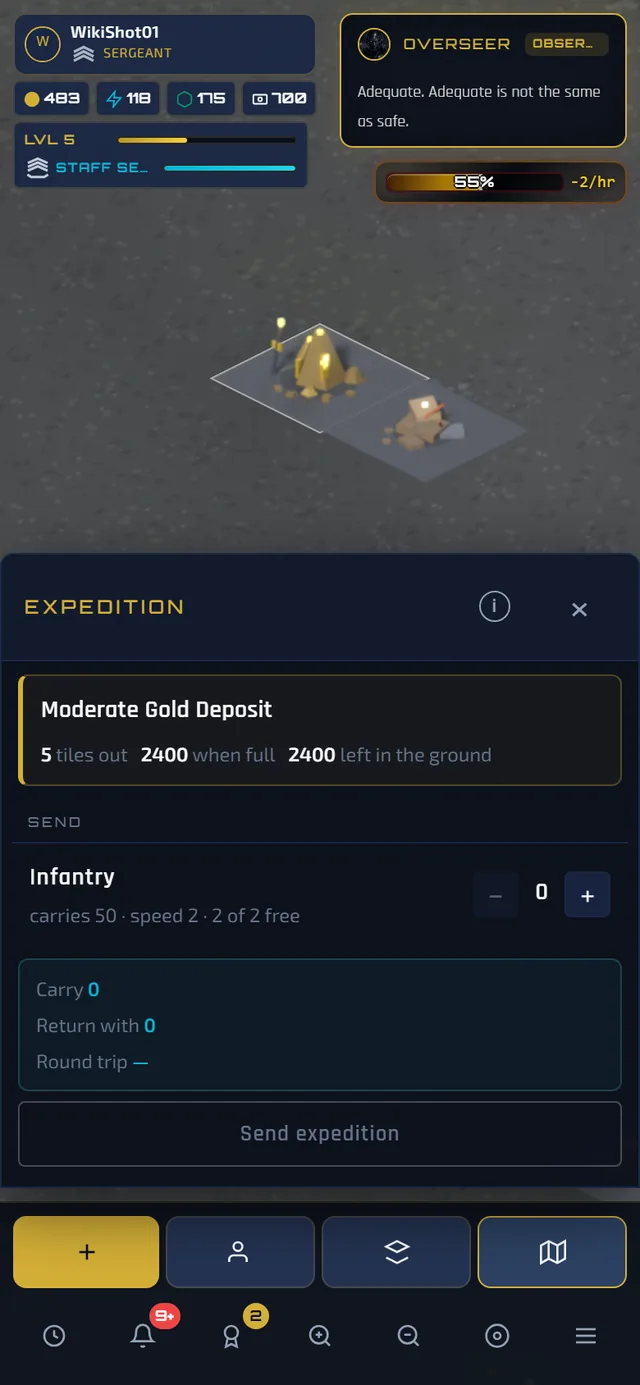
- Tap a deposit The expedition panel opens, showing how far out it is, how much it holds when full, and how much is left in the ground right now.
- Add units and send Each unit line shows what it carries, how fast it is, and how many you have free. MAX beside a line sends every one of that type; SEND ALL at the top of the section fills the party with everything you have. The estimate underneath tells you what the trip will bring back.
Neither button caps itself against the deposit — they send everything free, whether or not there is that much in the ground. That is usually what you want: a party bigger than the deposit simply finishes the dig faster. But if you are trying to leave troops at home for a second run, set the numbers yourself.
Deposits
Every Control Sector is scattered with 400 deposits, denser near the centre where bases are allocated. Each holds gold, energy or materials, and comes in one of three grades.
| Grade | Holds when full | Share of the sector |
|---|---|---|
| Sparse | 1,200 | about 55% |
| Moderate | 2,400 | about 32% |
| Rich | 3,600 | about 13% |
- Grade is not tied to distance. A Rich deposit can sit next door; look before you commit to a long walk.
- Other players use the same deposits. Two parties can be out to the same one, and whoever gets home second takes only what is left. The panel shows who is currently standing on a deposit, and a ring is drawn on the ground under an occupied one.
- The ground itself does nothing. The sector's terrain — waste, rubble and scrub — is generated per sector and is scenery. It does not slow a party, block a route or change a yield. Distance is measured in a straight line regardless of what is between you and the deposit.
Deposits run out
What a party takes is gone. A deposit is debited when the party gets home, not when it sets out, and when the last of it is carried away the deposit is stripped — it holds nothing and can be sent to by nobody. It recovers to completely full one hour later.

That is deliberately hard to misread. A deposit that had merely been dimmed would look like one further away; taking the colour out is what says "there is nothing here", the dark hollow reads as a hole something was taken out of, and the ring and slash mean unavailable in any language. The mark is grey rather than red, because red means an enemy everywhere else on this map and an exhausted deposit is not one.
Tapping one opens the panel as usual, with STRIPPED — recovering on the header and the send button greyed out and reading Deposit stripped. There is no countdown to the refill; come back in an hour.
The trip, leg by leg
Distance
Straight-line distance from your base to the deposit, rounded up to whole tiles. The panel states it as "N tiles out".
Walking out
The party moves at its slowest member's speed. Mixing one Heavy Infantry into a party of Light Tanks costs you two thirds of your pace for 80 extra carrying capacity — almost never worth it.
Digging
A full shift is 120 seconds. If the deposit holds less than your party could carry, the dig is shortened in proportion — the extra hands have nothing to load — with a floor of 20 seconds.
Walking home
This is the leg people underestimate. A loaded party is slower, in proportion to how full it is: at 100% loaded it moves at half speed, so the walk home takes twice as long as the walk out.
A full round trip to a deposit N tiles out, with a full load, is roughly three outbound legs' worth of walking plus the dig — not two. Plan accordingly when you are watching the clock.
Worked examples
Ten Infantry, eight tiles out, coming home full
- Party: capacity 500, speed 2
- Out: 8 × 30 ÷ 2 = 2m 00s
- Dig: a full load, so the full shift — 2m 00s
- Home: fully laden, speed 1 → 8 × 30 ÷ 1 = 4m 00s
- Round trip: 8 minutes.
Four Material Depots at level 1 produce 120 an hour between them. A single loaded trip is worth hours of that, and it takes minutes.
The same party, to a deposit with only 200 left
- Load: 200 — 40% of the party's capacity
- Out: 2m 00s
- Dig: 120 × 0.4 = 48s
- Home: speed 2 × (1 − 0.5 × 0.4) = 1.6 → 2m 30s
- Round trip: about 5m 20s.
That is the reward for over-sending to a thin deposit: not a bigger haul, a faster one. And a shorter trip means a smaller life award, since that scales with how full the party comes home.
Ten Light Tanks, to a Rich deposit eight tiles out
- Party: capacity 2,000, speed 3 — the same 200 per tank that the forty Infantry it took to build them carried
- Out: 8 × 30 ÷ 3 = 1m 20s
- Dig: a full load, so the full shift — 2m 00s
- Home: fully laden, speed 1.5 → 2m 40s
- Round trip: 6 minutes for 2,000 — four times the haul of the first example in three quarters of the time, and it occupies ten vehicle bays rather than forty bunks. That is what a conversion buys.
How much comes home
Both ceilings are checked when the party gets back, not when it leaves — so a deposit another player stripped while you were walking pays you what remains, which can be nothing. The panel's Return with line is the game's estimate against the stock at the moment you send; the transmission when the party arrives is what actually landed.
Richness decides how much is in the ground and therefore how many trips a deposit is worth. It does not cap a single trip: a big enough party empties a Sparse deposit in one run.
| Unit | Carries | Speed |
|---|---|---|
| Battle Tank | 320 | 1.5 |
| Light Tank | 200 | 3 |
| Heavy Infantry | 80 | 1 |
| Infantry | 50 | 2 |
| Recon Drone | 50 | 7.5 |
| Scout | 25 | 5 |
The panel shows Carry (what your party can lift), Return with (what it expects to bring back) and Round trip. If Return with is lower than Carry, the deposit is nearly stripped — you are sending more troops than the ground can fill, so pick a fuller deposit or send fewer units. Note that the Round trip figure does not include the laden slowdown on the way back, so a full trip takes longer than it says.
Watching a party from the map
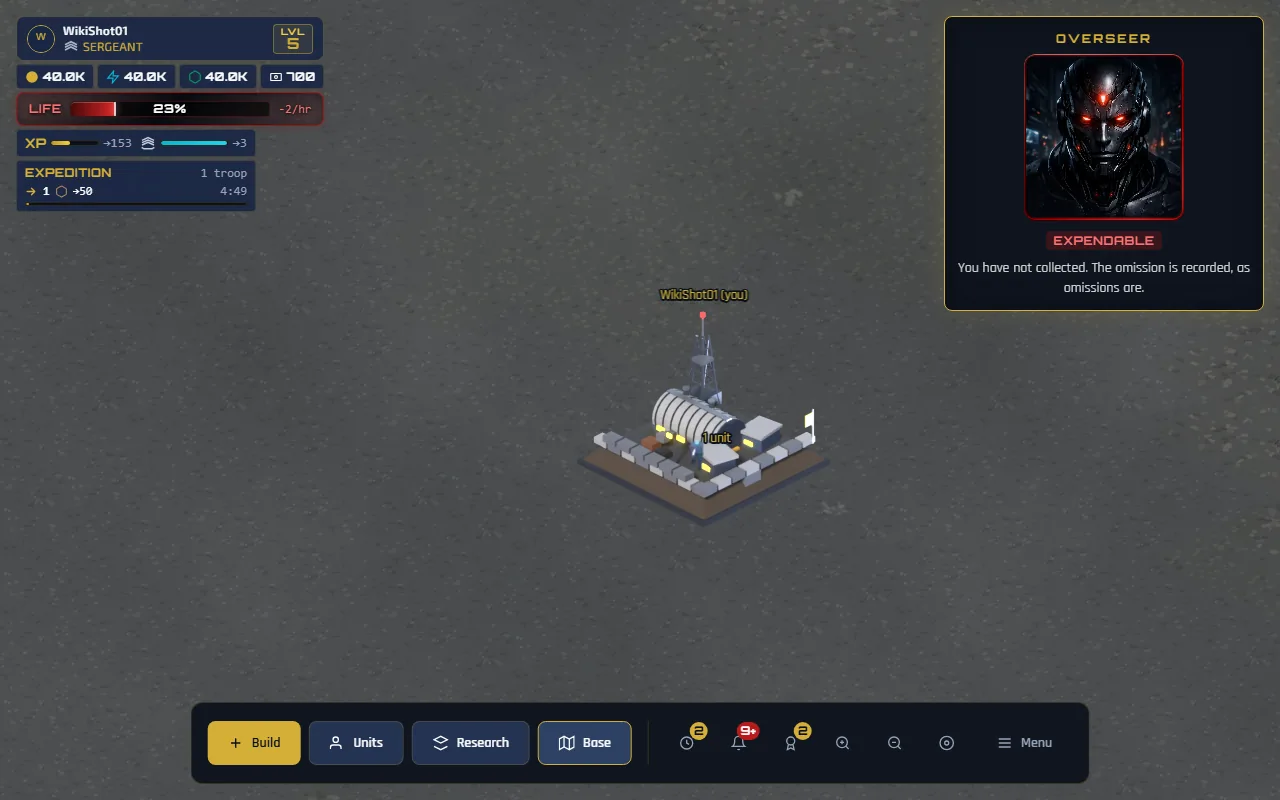
While the sector map is open, any party in the field appears in a strip under your profile. It removes itself entirely when nothing is out, so an empty corner means an idle army.
| Phase | The row reads | Means |
|---|---|---|
| Marching out | 6 → 400 | Six troops walking, expecting 400 — a forecast, not a holding |
| Digging | 6 180/400 | 180 of the 400 this dig will yield, loaded so far |
| Coming home | 6 400 | Carrying 400 home |
- The bar is the whole round trip. Two hairlines mark the moments the party arrives and stops digging, so a long walk to a short dig looks visibly different from the reverse — that is how march time and dig time stay on screen without a second countdown competing with the first.
- Tap a row to fly the camera to that party. It goes to where they actually are, not to the deposit — on a long march those are opposite ends of the map, and a recalled party may never have reached the deposit at all.
- Three rows are shown at once, soonest home at the top; a fourth scrolls.
- Hover or focus a row for the full sentence, which spells out each leg: "March out 3:00, dig 2:00, march home 6:00; home in 9:40."
Recalling a party
A party already out can be pulled back at any time, in one of two modes. Either way they still have to walk — a recall re-plans the journey home from wherever they actually are, it does not teleport them.
| Mode | Brings home | Speed home |
|---|---|---|
| Fast | Nothing — the cargo is dumped | Full unladen speed. The fastest they can possibly move. |
| Carry | Whatever has been dug so far | Slowed by the load, exactly as a completed run would be. |
- Recalling mid-dig keeps a proportional share. Half way through the shift and you keep half of what the trip would have produced — leaving early costs you the rest, not all of it.
- Recalling on the way out brings nothing back either way, because nothing has been dug.
- A recalled party cannot be recalled again. It is on its way home.
- A recall still counts as a completed expedition for the daily objective and for the life award — but the life scales with what came home, so a fast recall pays the minimum.
Forcing a march
Tapping a marching column on the map puts three controls beside it. Two are free: return turns them round, and redirect sends them to a different deposit. The third is gold, because it costs War Bonds, which are bought with real money.
A forced march adds half again to the party's speed for the rest of the leg they are walking, for 50 War Bonds. It stacks — buy it twice for double speed, three times for two and a half — and a recall takes the speed home with them, so turning back never wastes what you paid for.
- It does not speed up the dig. Only the walking.
- It ends when they arrive. The boost is bought for the leg they are on, not for the party.
- Each one buys less than the last. This is the part worth understanding before you spend anything.
That last point is arithmetic rather than a penalty. A forced march shortens the time remaining, so the same 50 bonds is worth a great deal at the start of a long march and very little near the end of one. Measured on a single party, three purchases seconds apart bought 130 seconds, then 65, then 39 — same price, same march, and the third was worth less than a third of the first.
The disc shows you the answer before you buy: it carries the price and the time that price would actually save, recalculated as they walk. Hold it down to buy; lift early and nothing is spent.
Early in a long march, when a deposit is about to be taken by somebody else, or when a party is carrying a full load and you want the life award banked. Late in a short leg it buys seconds.
Picking a target
- Send a full party. A bigger party lifts more, and housing is what caps how big it gets — see Training Yards.
- Keep the party one speed. The slowest unit sets the pace for everyone.
- Close beats rich. A Sparse deposit three tiles out will out-earn a Rich one twenty tiles out over an evening, because you can run it repeatedly.
- Don't send to a nearly-empty deposit unless you want the trip to be quick. You cannot bring home more than is there, and the life award is smaller for it.
- Stripped a deposit? Come back in an hour. It refills to full.
- Expeditions pay XP too — 15 plus one per tile of distance, so a long run is worth more than a short one on that axis.